Sunday, November 28, 2010
Car Work halt
With my mom's skull injury, I doubt I will be getting back to the Cobra very much. I am way behind on real life stuff and don't like working on the car much when it gets down into the 30s.
Sunday, November 21, 2010
No report
I did nothing on the car this week. I did get new batteries for the camera, and it seems to be working well again.
I won't get anything done on the car this coming week. My mom fell and fractured her skull and will be hospitalized for a few days. Then the holiday, etc. Maybe the following week, if I am lucky.
I won't get anything done on the car this coming week. My mom fell and fractured her skull and will be hospitalized for a few days. Then the holiday, etc. Maybe the following week, if I am lucky.
Monday, November 15, 2010
Little work done
I only got an hour in on the car this week, although I did spend a LOT of time researching and trying to figure out what parts are used for the next step. That step is to install the inside fender liners. The aluminum panels will get riveted to the engine bay frame, but like everything else, the fit is very tight. I got them test fit and it was so-so. It will just take more time than you would think to get them perfectly lined up. I had some trouble figuring out how the bottom connects and which were the right brackets to use.
I did apply the POR-15 rust preventing paint to the spots on the bottom of the frame that I had missed (twice) earlier. I still need to install the clamps that will hold the brake lines in place, but that is just a couple of screws and will just take a couple of minutes. But it should be done before hanging the aluminum fender liners.
My camera is acting up again, so no pictures. I had gotten new batteries a few weeks ago, but they must not be good. (They were very cheap). The camera shuts itself off very quickly, and was not cooperating when I tried to upload some other pictures to my computer.
Sunday, November 7, 2010
No Car Work
I did not get to work on the car this week. Too many real-life things to do. I did purchase another small can of POR-15, the rust-proofing paint, to cover up the last set of spots that I have missed on the frame. Third time is the charm, I hope.
Sunday, October 31, 2010
Trouble?
I managed to basically finish off the brakes this week. I got the pushrods connected to the brake pedal easily after taking off the brake light switch that I had installed earlier. Essentially, I needed to be able to move the brake pedal up more than it was allowing in order to connect everything. Simple enough; I just wish the manual had said to wait on the brake light switch until after the master cylinders were in. There was no reason not to, and it made the MC install much easier.
I then ran the brake lines from the master cylinders to the previously run hard lines from a couple of years ago. Not much of a problem with that. I have not clamped everything down, but everything is run and tightened, so there won't be any trouble there. A small concern is that the lines running from the master cylinders are very very close to the exhaust headers coming off of the engine. Boiling the brake fluid is a bad idea, so I may end up doing something to keep them from getting too hot.
I should have taken a picture or two of the brake stuff, but while I was down under the car connecting the brake lines, I noticed a rather serious crack in the engine block. It is the bolt that connects the mechanical fuel pump to the engine block. The whole thing is cracked. I must have over-tightened this in November 2008 when I installed the fuel pump. I have a picture of that crack, but it does not show it very well.

I will have to wait and see if there is an oil leak. I am not that close to filling the engine with oil, so I guess I just mush on. I think the worst case is that I may have to have someone weld it back up. My guess is that I may be okay since the crack seems to all be on the outside of the block.
Sunday, October 24, 2010
My Dumbest Move Yet
Without a doubt, I did the dumbest thing yet on the build. (Yes, even dumber than whacking myself in the face with the torque wrench). This week I worked on something that should have been pretty easy, but I managed to make it tough.
The task was to install the master cylinders for the braking system. When you press on the brake pedal, what makes the car stop? Well, the brakes are activated by fluid. That fluid gets pumped to the brakes by a master cylinder that is connected to the brake pedal. It has a piston that pushes fluid from the reservoir to the brake calipers. That piston is connected to the brake pedal. In this car, there are 2 separate master cylinders, one connected on either side of the pedal, that pump fluid separately to the front and rear brakes. This is a safety feature so that if there is a leak going to one pair of wheels, you will still be able to stop with the others. It is also a performance feature that lets you balance the braking power between the front and rear as you see fit. Here is a picture of the MCs that came with the kit.

The first step is to put the white plastic cap on the top that will connect the fluid reservoir to the MC. The instructions say it is pretty tight and easy to crack the caps when putting them on. Some people have needed to use heat (like a hair dryer) to get the cap to fit. Here is my MC in the vise as I was trying to get the cap on.

Well, I spent 2 hours trying to finesse the cap on this sucker. It was not even close. I tried heat. I tried force. I tried lube. I tried cursing. I tried prayer. Nothing was even close. So I did some measuring. The cap inner diameter was 1.34 inches. The outer diameter of the part I was trying to put the cap on was 1.49 inches. How could that work? Heat can't make that much difference. I even tried re-reading the directions. No help. Then I looked online at other people's pictures. I studied and studied them. Then I noticed that theirs did not seem to be using the rubber gaskety thing that was on mine. Close examination revealed that this was not an integral part of the MC, but was just a packing cover to protect the O-ring underneath. DOH!!! Once I took that off, it took about 20 seconds to slide the cap on. No heat or anything. I swear that it looked like it was an important part of the system and that nowhere did any instructions say to remove it. Ugh.
Here is a picture of the master cylinders mounted to the firewall.

I am currently having trouble connecting the piston rods to the brake pedal, so they are not quite functional yet. I've spent another couple of hours on that task and it really should have been easy. Not sure why I am having trouble with that step. Anyway, I should get that solved and be able to connect the rest of the steel tubing to finish the brake system and then move on to riviting the inner fender liners to the frame.
Thursday, October 14, 2010
Steering binding solved
There is nothing like a little break to clear the mind to help solving problems. When I went back this week to working on the car, I quickly figured out what was causing the steering shaft to bind. I could only get the steering wheel to make about a half turn. The problem was that the set screw and jam nut holding one of the u-joints in place was hitting on the pillow block that held the bearing and shaft right under the dash near where the driver's knees would be.
Here is a picture taken after I got it fixed.

The bright O-shaped thing is in reality a nut that acts as a jam nut. The jam nut holds the black set screw in place by encircling it. The set screw tightens through the U-joint into the steering shaft. Just to the right in the picture, you can see the bottom of the pillow block (the shiny part) that is holding the bearing and steering column shaft at an angle going up to where the steering wheel will be. Anyway, the 2 shiny parts were hitting each other and shouldn't have. The solution was simple--bang on the steering column with a big rubber mallet to move the U-joints away from the pillow block.
Here is another useful picture.

In it, you can see a vertical line drawn with a silver marker on the shaft that goes through the firewall into the engine compartment. I made that mark prior to swinging my rubber mallet. You can see that where the line used to be flush against the bearing, it now shows that the shaft moved about a quarter-inch or so.
I did also have to make another slight modification. The steering column was still rubbing slightly against the dash frame. So I took it all apart again to add a couple of washers to lower the pillow block and bearing so that the shaft would not rub. Seems to work beautifully now.
I could not completely finish the steering yet, because the steering wheel cannot go on until the dash board goes in. There is a small hole in the dash for the steering shaft to pass through, but it would not go over the wheel or the hub that holds the wheel either. So later on, I will have to finalize the turn signal stuff and steering wheel.
With the shafts all in their final positions, I was able to start to look at how to fix the power steering pump location problem. Recall that I had to remove the pump to get the steering shafts in place. A first pass at looking at the situation seems to indicate that I will be okay with my current setup for the pump, but will have to get a slightly longer belt. The current one is 50.5 inches long, and has to be about an inch or so longer to accomodate the slightly raised location of the power steering pump. That had to go up just a tad in order for the hoses taking power steering fluid from the pump to the steering rack to clear the steering shaft. Unfortunately, the belt replacements come in 51 and 52 inches, not 51.5 which is what would have been easiest. I tried the 52, but it was just too long, so I returned it for a 51. That was just barely long enough, but with some serious pulling using a ratcheting tie down strap, I was able to get it to fit perfectly. There is about 3/8 inch clearance now from the steering shaft to the power steering pump hoses.

After that came the throttle cable and gas pedal. This was pretty straight forward. I got the holes drilled for mounting the pedal and for passing the throttle cable through the firewall. It goes through a stainless steel housing up to the carburetor so that when you press down on the gas pedal the cable opens up the carb a little so more air and fuel pass into the engine. I ended up drilling an extra hole into the driver's side footbox so that I could put in a clamp to hold the cable housing in place. It was very close to the steering U-joints, so I thought this would keep them from getting caught or rubbing on each other. It may look a little funny, but it is undoubtedly safer. Here are 3 pics showing the gas pedal, the housing looping around as it comes out through the firewall, and the routing up to the carburetor.


Sunday, October 10, 2010
Steering
I got about 4 hours in this week on the car. I started out messing around with the gas pedal. It turned out to be a little more complicated than I expected at first. Actually, I had to end up taking the whole thing apart from what came in the package shown in last week's post in order to re-orient the pedal part (looks like a spoon) to the other side of the pivot, and to create the angle for the top part of the pedal which will connect the wire that opens up the carburetor when you depress the pedal. I decided to wait on continuing with that part until I got the steering shaft stuff fixed afterall.
So I decided to whip out my cheap little dremel tool and try to whittle out the inner bore of the steering shaft bearing by a couple of thousandths of an inch. That actually ended up working quite well. So on to actually assembling the steering shafts.
I had a hard time getting everything to come together the way the manual outlined. Maybe if I had another set of hands, I could have done it. Instead I connected everything and raised it all into place. That worked, but I found it to be binding. First, it was that the shaft coming up to the wheel was rubbing on the dashboard frame. A little dremel grinding fixed that. Then I put it all together again and it was still binding. After a half an hour or so, I figured out that the mid-shaft was not put together properly. I had inserted the shaft too far into the joint so that when it turned, it would hit on the other shaft. I fixed that, but there still is binding. Not as bad, but I haven't figured out the cause yet. Anyway, here are some pictures showing the work so far...
Here you can see the U-joints where the steering shaft goes through the firewall.

Here you can see the steering components in the footbox.

Here you can see the steering shaft coming up through what will eventually be the dash and the hub for the steering wheel.

I will have to find the source of the binding before I can proceed with anything else.
Monday, October 4, 2010
No Work
I still did no car work, feeling a little discouraged about the bearing/steering shaft difficulties. What I think I may do is proceed onto the next step to rebuild my confidence a bit. That step is installing the gas pedal and throttle cable. Here is a picture of those parts.


Sunday, September 26, 2010
No Car work
Sorry, I did not get to work on the car this week. It ended up taking longer to get both my VW and my garage door fixed, and then I was just way behind on routine life stuff. Here are some of the promised pics anyway...
Here is the broken spring...

Here is the replacement bearing...

Here is the bearing in place in the firewall...

Here is the broken spring...

Here is the replacement bearing...

Here is the bearing in place in the firewall...

Sunday, September 19, 2010
Little accomplished
I only worked on the car once this week, really. I did manage to get the U-joint that connects to the steering rack connected. I got the shafts going through the firewall okay, though I did have to take apart the U-joints that were previously connected to the other shafts, even though I had used LOC-TITE on them. I got the original bearing installed in the firewall, but the new bearing did not quite fit with the shaft that has the steering wheel bolted to it. I tried force. I tried oil. I tried freezing the shaft so it would shrink a tiny bit, but that still was not quite enough. It is so close, though. I think I will try freezing it again and carefully heating the bearing so it will expand the hole that the shaft fits through.
Right now, I cannot even work on the car if I wanted to because my garage door finally broke good and proper. The huge spring that helps lift the door snapped. Thank goodness it was safety-wired or the Cobra body would have been damaged. I will get that fixed very soon. I took a couple of pictures, but will wait on posting them until next week when hopefully the steering system will be completed.
Right now, I cannot even work on the car if I wanted to because my garage door finally broke good and proper. The huge spring that helps lift the door snapped. Thank goodness it was safety-wired or the Cobra body would have been damaged. I will get that fixed very soon. I took a couple of pictures, but will wait on posting them until next week when hopefully the steering system will be completed.
Sunday, September 12, 2010
No Labor for Labor Day week
I did not get to work on the car this week. I did manage to get the missing part ordered from Fastenal, and I picked it up on Friday. I've fallen a little bit behind other things in life, like renewing my driver's license that expired in May, which I only found out about when I got stopped for speeding in Winfield, MO. Doh!
Saturday, September 4, 2010
Steering
I got a fair amount done this week before running into problems. I did complete the brake pedal assembly installation, including the brake light switch. I had some trouble getting the bolts through the firewall straight, but otherwise it was not bad.
Then it was on to the steering chapter. I put together the shafts on my workbench, connecting them with the U-joints, all of which I had painted long ago. Everything seems to fit okay, but the paint makes the fit through the firewall bearing very tight. The bigger problems arose when I realized that I was shorted one of the two bearings that should have come with the kit. That is a special part that I can't just walk into an auto parts or hardware store to buy. I can send away to get one delivered to my local Fastenal store, but that will take a few days, and naturally this happens on a long weekend. Some mail order places sell them for about 6 to 8 bucks, but charge another 6 for shipping. Fastenal is $11, but no shipping.
I also ran into obvious problems when I was loose fitting what I could while dealing with the bearing shortage. My steering shaft does not quite clear the power steering pump and its hoses. It is very close, but I need to get another half inch or so of clearance before I am good to go. I am not sure how I will do that, but I ought to figure out a way without too much trouble. Maybe re-routing the hoses, maybe adjusting the existing pump bracketry and getting a different belt, I am just not sure yet.
I had more tool troubles, too. My old Craftsman drill seems to have given up. Neither battery seems to be charging at all now. (Yes, it is plugged in)! I also had a socket adapter break when I was torqueing one of the bolts to its final tightness. Fortunately, I had a spare one and could continue working. And my garage door got stuck again, this time worse than the first. It turns out that a piece of wood trim had come loose and gotten jammed in the works, causing one of the rollers to jump the track. That got fixed right this time, now that I could see what was going on.
Oh, and kudos go out to NAPA. A long time ago, I had a different garage door problem that required a bolt replacement. I just happened to have one the perfect size on hand in my car parts, so I used that. It was not spare though, and this week I needed it for some of the steering system mounting. Off I went to NAPA and they just let me take one for free. Good thing I was wearing my NAPA hat when I went into the store, I guess. They didn't know me from Adam.
Sorry for no pics. I will double up next week.
Sunday, August 29, 2010
Another 2 1/2 Chapters Finished
It was not all gravy, but I managed to find quite a bit of time to work on the car this week and was very productive. I finished the chapters about mounting the cockpit and upper frame.

I did manage to get a rivit in each footbox outside corner, and I got the excess fiberglass trimmed back (about an inch on the driver side, less on the passenger side) to add some more room for feet on both sides. Notice all the dust in the picture. Man, is that stuff itchy and hard to wash off.
And it was particularly hard for me to get my big arm down in the engine compartment to rivit this piece of aluminum (actually, one on each side) that seals the cockpit near the footbox area from the transmission tunnel.

I did have quite a few weird issues, mainly with tools, that required fixing or at least patience. I used my air die grinder to sand off the excess fiberglass, but the compressor could barely keep up. The light on my hanging work light died. My garage door had one of its rollers pop out of its track. I ran down both of my cordless drill batteries and got very frustrated with not being able to work while they SLOWLY recharged. That actually went on for a couple of days before I broke down and bought a new corded drill from Harbor Freight. And OMG, what a huge difference that made. My cordless much not have much of a motor, while the new one really cuts great. I had to drill 4 holes in some thick steel frame members and what was taking about a half an hour and all of my strength with the Craftsman 15.6 Volt drill, the new one took about a minute. I could not believe how much better it cut. Thirty bucks very well spent.
Right now, I am in the middle of working on the brake pedal assembly,

its frame (which will eventually hold the brake master cylinders on the engine side of the firewall),

and the brake light switch. One step that the manual said would be very tough, replacing 6 studs that come from the manufacturer heavily thread-locked, was actually very easy. Here is a picture with one old stud still in place before I removed it.

The next step was drilling the frame for the holes that hold the pedals in place was a huge effort, until I got the new drill. I should finish the brake pedal stuff pretty soon this week. BTW, I have decided to leave the clutch pedal in place but will fasten the pedal to the top of the footbox to keep it out of the way. I am not going to cut the hole in the firewall for that master cylinder though. I figure I can do that easily enough later on if I decide to ditch the automatic transmission for a manual. Then the next step will be to work on the steering system.

I did manage to get a rivit in each footbox outside corner, and I got the excess fiberglass trimmed back (about an inch on the driver side, less on the passenger side) to add some more room for feet on both sides. Notice all the dust in the picture. Man, is that stuff itchy and hard to wash off.

And it was particularly hard for me to get my big arm down in the engine compartment to rivit this piece of aluminum (actually, one on each side) that seals the cockpit near the footbox area from the transmission tunnel.

I did have quite a few weird issues, mainly with tools, that required fixing or at least patience. I used my air die grinder to sand off the excess fiberglass, but the compressor could barely keep up. The light on my hanging work light died. My garage door had one of its rollers pop out of its track. I ran down both of my cordless drill batteries and got very frustrated with not being able to work while they SLOWLY recharged. That actually went on for a couple of days before I broke down and bought a new corded drill from Harbor Freight. And OMG, what a huge difference that made. My cordless much not have much of a motor, while the new one really cuts great. I had to drill 4 holes in some thick steel frame members and what was taking about a half an hour and all of my strength with the Craftsman 15.6 Volt drill, the new one took about a minute. I could not believe how much better it cut. Thirty bucks very well spent.
Right now, I am in the middle of working on the brake pedal assembly,

its frame (which will eventually hold the brake master cylinders on the engine side of the firewall),

and the brake light switch. One step that the manual said would be very tough, replacing 6 studs that come from the manufacturer heavily thread-locked, was actually very easy. Here is a picture with one old stud still in place before I removed it.

The next step was drilling the frame for the holes that hold the pedals in place was a huge effort, until I got the new drill. I should finish the brake pedal stuff pretty soon this week. BTW, I have decided to leave the clutch pedal in place but will fasten the pedal to the top of the footbox to keep it out of the way. I am not going to cut the hole in the firewall for that master cylinder though. I figure I can do that easily enough later on if I decide to ditch the automatic transmission for a manual. Then the next step will be to work on the steering system.
Saturday, August 21, 2010
Mushing onward
Having satisfied myself that my engine title issues will resolve themselves down the road (in Rolla), I have gotten back to work on the car fastening down the cockpit tub this week.
This should have been a pretty easy task, but it turned out to be a little tougher. I had to drill 4 holes in the tub that lined up with the pre-drilled holes in the frame to hold the tub in place. Easy enough. But while I was down there, I was also supposed to drill 10 more holes for the seat and seatbelt mounting spots. Twelve were easy enough, though I really don't like laying on my back doing this work. But 2 of the holes were not accessible any more because they were obstructed by the driveshaft safety loop that I installed a few weeks ago.
My first solution seemed simple enough--just cut off the end of the safety loop that was not needed and was the source of the obstruction. So I locked the cutoff wheel to my angle grinder and plugged it in, prepared to just lop off the excess. When I tried to figure out how to hold the tool at an angle that would let me cut through the steel, I had such a hard time maneuvering while on my back under the car, it seemed extremely dangerous to go that route. In an inspired attack of safety consciousness, I instead decided to try to take a bunch of measurements and drill the holes from above. I used a 1/8" bit and managed to blindly hit both 3/8" holes in the steel after drilling through the fiberglass. Then I widened out the holes by hand with a larger bit and hand file.
Next up was drilling more holes and riviting around the footboxes. Simple enough, except that my frame includes a modification that Hurricane implemented after some other builders figured out a way to get more footroom for the driver, and the instructions for fastening the tub around the footbox don't quite work as they did before. So I posted some questions online and am waiting to get satisfactory guidance on how to proceed before I do any more riviting there. Pictures will come when I finish up. Should be pretty quickly.
Sunday, August 15, 2010
Achilles Tendonitis
I did not work on the car this week as I am fighting a very sore left heel. I already had a doctor's appointment scheduled for this past week and she said I had damaged my achilles tendon. She ordered the usual--rest, ice, and stretching--and also gave me Celebrex. And my mom got me a heel pad for my shoe. All of that seems to be helping a great deal and I am off the crutches I used earlier in the week and actually feeling pretty good.
I did go to the Gateway Cobra Club monthly meeting at Sonic in Chesterfield this past Tuesday. It used to conflict with my trivia night at Chevy's, but that seems to have ended. Anyway, the guest speaker was Officer Fountain, the guy who is in charge of doing state inspections of these cars for the county. His talk told me what I already knew, that my engine is just not going to be titleable with them as is. Very depressing.
I did go to the Gateway Cobra Club monthly meeting at Sonic in Chesterfield this past Tuesday. It used to conflict with my trivia night at Chevy's, but that seems to have ended. Anyway, the guest speaker was Officer Fountain, the guy who is in charge of doing state inspections of these cars for the county. His talk told me what I already knew, that my engine is just not going to be titleable with them as is. Very depressing.
Saturday, August 7, 2010
Cockpit and upper frame installed
This week, I determined that I was missing a couple of things that were needed to install the cockpit. When I got my kit, I did not receive the weatherstripping or 4 large rubber washers that isolate the frame from the cockpit. Fortunately, a quick trip to Home Depot and about $10 remedied that oversight.
I got the weatherstripping laid without any problem
and then Del Poe

came over before playing golf on Friday and we managed to get the cockpit and upper frame installed. Both pieces dropped into place beautifully.


I still need to drill a few holes in the fiberglass for the bolts that will fasten the tub to the frame, and do some riviting around the footboxes. I think I also drill the holes for the seat brackets now too.
I got the weatherstripping laid without any problem

and then Del Poe

came over before playing golf on Friday and we managed to get the cockpit and upper frame installed. Both pieces dropped into place beautifully.


I still need to drill a few holes in the fiberglass for the bolts that will fasten the tub to the frame, and do some riviting around the footboxes. I think I also drill the holes for the seat brackets now too.
Sunday, August 1, 2010
This week saw me finish tightening the header bolts and connecting the battery cables to their final location on the starter motor. I also connected the grounding strap to the frame and got a good continuity test from the battery end of the cable to many different spots on the frame. Thus the main ground is good. I also tidied up the transmission lines that will eventually run to the oil cooler at the front of the car. Oh, and I also found another big spot where I missed rustproofing.
I spent some time thinking about what else should be done more easily now than after I put the cockpit into its final position. It is another case of over-thinking things and not getting real progress made. So rather than figure out how exactly to run the transmission oil cooler lines, the neutral safety switch, etc., I have decided to go ahead and put the cockpit in place this coming week. Even if it makes it harder to do future things, I want to keep making progess, and the cockpit will be major, allowing me to proceed on the engine bay, the wiring, the steering, the brakes, etc.
I did figure out a way to get the front end of the car up in the air a little higher, maybe an inch or so. That should make working under the car a tiny bit better. No pictures this week, but next should be exciting if the cockpit gets done.
Saturday, July 24, 2010
Battery cable completion
This week, I managed to finish off the battery cables. I ran the cables a very long time ago from the rear of the car, where the battery will eventually sit. Now I was ready to cut them to the exact length and solder on the ends which will connect to the starter and the frame for grounding. Cutting was not too big a deal; quick work with the cutoff wheel.
The kit had not come with the necessary lugs that get soldered (or crimped). Not sure why. Anyway, a long time ago I bought 3 of them, though I only needed 2. I bought one at a Old Dog hot rod shop, but that was the only one they had. Later I went to Auto Zone and they only sold them in pairs. So I ended up with 3. Since I had an extra, I decided to use one and the short piece of cable that I cut off to practice my soldering technique and I am very glad I did. It took me a while to figure out exactly how hot to get things, how much solder to put in the cup, to learn not to twist the copper wires to make them go into the cup easier, how to do the heat-shrink process, etc.
Unfortunately, the 2 lugs that I got at Auto Zone were not as nice as the one I got at the specialty shop. The good one seemed to have a bigger cup to fill with molten solder, and a little bit bigger hole to push the cable into. I clamped the lug into a handheld vice, used my mini torch to heat the lug, inserted the solder into the cup when it was hot enough to melt, and shoved the cable into the cup. Here are 3 pictures I managed to get.


The last picture shows the finished product. You can see that the black wire has something of a neck between the lug and the main cable body (hidden a bit by the heat shrink). The red cable, with the good quality lug, is perfect and is probably the best quality work I have done on the whole car.
I also re-visited my headers this week. I had loosely put them in place a long time ago to be able to check clearances on things, but now it is time to think about putting the upper engine frame and the cockpit in place, so accessing the header bolts will be much more difficult. Sadly, I have come to realize that these headers are pretty crappy. Lots of other Hurricane builders have complained about these parts that came with the kit. They were special built, and may be a problem. I know the ports don't exactly match the gasket or the head ports. This may result in an exhaust leak, poor performance, backfiring, etc. Worst of all, I am having a devil of a time just getting them bolted into place. The pipes are just too big to get normal wrenches on the bolts, and in at least one case, there does not seem to be enough room to even get the bolt into its position to be tightened. I may have to do a little grinding or even buy something new. For now, I have bought some special "crow's foot" wrench heads and will see if I can get things tightened up as is.
Sunday, July 18, 2010
Tiny bit of carwork done
This week, I managed to get a couple of things done. I buttoned up the transmission pan, torquing everything to 9.5 ft lbs. I also redid the safety loop, which turned out to be a pretty tough job. In the end, the loop is great, and it is tightened to final spec too. I determined that I need to redo the transmission fluid line connections, as they are tight but at a bad angle. The lines also still need to be completed, but I think that can wait til I work on putting the radiator and oil cooler in the front. I also removed some of the rustproofing paint so the ground will have better conductivity, but now I am thinking I may want to make that 3/8" instead of 1/4". I found my missing mini torch, so I can now finish off the battery lines, and I bought some dielectric grease to be used on some of this stuff. Nothing really was picture-worthy though. Oh, and I retrieved Dan Dog who escaped the garage while I was working and chased a car down the street.
Sunday, July 11, 2010
Congrats to Kelly and Nathan
This week was family-filled as Nathan and Kelly got married. I did manage to get just a little bit of carwork done. I drilled a hole into the frame for the main battery/engine electrical ground, and test-installed the grounding strap onto a bolt that I ran through the hole. I also purchased a voltage regulator which will eventually get installed to keep the engine's alternator from over-charging the car battery. Finally, I got around to a pretty thorough cleaning of the garage which was badly needed. There was still a lot of fiberglass dust left from the work last fall of getting the transmission linkage working with the cockpit tub on.
Sunday, July 4, 2010
Happy Independence Day
Not a lot to report, but I did manage to squeeze out an hour and a half to use the rest of my rust-proofing paint, POR-15, to touch up the spots on the frame that I missed the first couple of coats. There were also more places that I would care to admit where the paint had gotten scraped off by wayward tool usage. Not much fun, and nothing worth taking any pictures.
In other news, Paul Proefrock had his car pass state trooper inspection this week. He ended up taking it to Rolla and everything went very smoothly. Someday I hope to be doing the same.
In other news, Paul Proefrock had his car pass state trooper inspection this week. He ended up taking it to Rolla and everything went very smoothly. Someday I hope to be doing the same.
Wednesday, June 16, 2010
Safety loop pictures
As promised in the last post...
The parts all painted nice and shiny...

All put together...

It took surprisingly long to assemble everything as some of the fitment was not exactly perfect. In fact, I had to undo the X brace altogether and put the brackets in between the 2 big pieces of steel frame to make everything come out like I wanted.
Monday, June 14, 2010
Driveshaft Safety Loop
I have found a little time here and there to work on the driveshaft safety loop. In test fitting it, I determined that it was borderline to fit the way everybody else's did, by bolting to the existing X-brace bolts. I took a little time and decided that if I offset the holes in the bracket a bit, that I would gain enough room to move the loop part a little bit farther back on the shaft itself. The SCCA (Sports Car Club of America) mandates that the loop be within 6 inches of the front U-joint. Mine was only about 2 or 3. But since my driveshaft is so short, I figure I should be fine.
I have carefully measured and drilled the holes for mounting the bracket to the frame and have also hit it with a coat of POR-15, the rustproofing paint. Now all I need is for it to dry and bolt everything together. Should be a breeze. I have been procrastinating a bit because I should also use the leftover POR-15 to touch up the frame where I missed some spots the first time, and that means spending a fair amount of time on my back painting the underside of the frame (with a sprained left thumb) in long sleeves and pants because you just don't want to get this stuff on you. Anyway, not something that I exactly look forward to.
Pictures will follow soon when I finish bolting the loop together.
Saturday, May 29, 2010
Driveshaft done
I picked up the driveshaft on Tuesday and it was the perfect size. However, I had mis-measured the end caps by a 1/16 of an inch and had to take it back to swap those out. They were very nice about that and did it right when I brought it in, and about taking back the extra hardware I had bought, not knowing at the time if I would need it. Also, I was happy that the final price was almost $40 cheaper than they quoted me.
When I finally got everything right, it went right in in less than 15 minutes. The only down part of that was learning that Dan was not too happy to be with me in the garage when I was working. He just layed out on the floor near my pool table while I worked. Probably for the best in the long run, since it wouldn't be all that safe for a little curious dog. Now the pics...
Two views of the driveshaft installed


A closeup of the endcap/U-joint all mated up.

I also affirmatively decided on installing a driveshaft safety loop and ordered one from JEGS on sale for $19.99. It may arrive today via Federal Express. I will need to use the rust proofing paint on that before installing it, and I will also take that time to touch up the frame. I had purchased a small can of the POR-15 a year ago that I never opened, so I am good to go on that as soon as the loop arrives.
After that, it will be time to tidy up the tranny, mount the cockpit tub, and mount the engine bay frame. Then it will be on to wiring and the steering system.
Monday, May 24, 2010
Working again
...Or at least paying again. I finally got around to ordering my driveshaft today from Driveshafts Unlimited out in Arnold. They were able to use the measurements I did last year when I was thinking about ordering from a different place online, but I like these guys that Paul had also used. They said it would cost about $240 and be ready in 24 hours.
After I get that installed in this spot
 the next step will be to decide about the driveshaft safety loop. Basically, it is an optional piece of metal that keeps the driveshaft from doing too much damage if anything ever breaks. Kind of important since it is spinning so fast, just inches from the driver's and passenger's seat.
Sunday, May 9, 2010
Still no work
I have still not worked on the Cobra. My ribs are better, but still too sore for golf. I probably am up to working on the car and should. The Passat went back into the shop week before last when the power steering started to go away. It turned out that there was a leak in the system caused by a couple of loose hose clamps, most likely from when they replaced the engine, so there was no charge.
Dan the dog and I have started training classes. We've been to 3 now and they are great fun. Vivian the trainer is amazing; a true professional. I wish I could get Dan to respond as well as she does. Perhaps in time.
Dan the dog and I have started training classes. We've been to 3 now and they are great fun. Vivian the trainer is amazing; a true professional. I wish I could get Dan to respond as well as she does. Perhaps in time.
Sunday, April 25, 2010
Still hurting
Its been 15 days and the ribs still hurt a lot. I am able to sleep a little better at least, so I am a little happier, at least. But nothing got done on the car. Paul did come by to take some measurements off of my car for some improvements that he and the Hurricane guys are going to make to the fuel tank.
Sunday, April 18, 2010
Bruised Ribs
I took a nasty fall in my garage this past week and have banged up my ribs pretty good. I was wearing my spiked golf shoes while cutting my hilly back yard when I ran out of gas. So I went back to the garage and found I had more gas, but it had not yet been mixed with the engine oil for 2 stroke motors. I had some on the very top shelf and when I reached for it, my feet went out from under me and down I went. I landed with my ribs hitting on the wooden edge of the chair, badly bruising them. Sleeping and just breathing hurts, though I have had worse and it does seem to be getting some better.
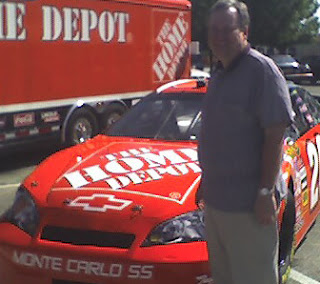
On a brighter note, I did get my taxes done and most of my yard work prior to the injury. I hope to get feeling good enough this week to get back to the Cobra. I am inspired a bit by Paul Proefrock's car getting finished at the painter. Here is a pic of his car I grabbed off of a forum:

I suspect I will end up using the same painter. Seems a long way off though, sadly.
Saturday, April 10, 2010
No work just yet
I still haven't found the opportunity to work on the Cobra. I am slowly winding down the regular springtime tasks and getting the house squared away for my wonderful 4-legged housemate.
I also had more Passat issues. Three more days at the dealership having them replace the thermostat that I thought (and told them before) might be bad. But it is all good. They got it fixed and it is working beautifully now; and they just charged me for the part, no labor. Then a few days later, I got a flat left rear tire, thanks to a stray screw from someplace. I saw the flat in the garage and fortunately was able to get it aired up well enough to make it to Dobbs. I ended up getting 4 new tires as I was about due anyway.
On one good note, Dan seemed okay with being out in the garage with me as I worked on the tire. Just a little skittish as I did things he did not expect, but when I turned on the terribly loud air compressor, he did not protest much at all. I was quite surprised at that, since he has gotten spooked once when we stopped in traffic next to a couple of very loud motorcycles, prompting him to lose bladder control when we got inside Baba's house just a minute or so later.
Saturday, March 27, 2010
2 great things happened this week
#1 - I got my Passat back after about 6 weeks of being without a car. Well, I did have access to my mom's RAV4, so I did survive.
#2 - Since I did not have to pay the $7000 for a new engine, I decided to rescue a little guy named Dan. (My friend Greg rescued his brother Stan).


Since he is only 1 year old (or thereabouts) right now, he may actually live long enough to see the Cobra get finished. He is an excellent car dog. Any ideas about a new name? He doesn't answer to Dan. Perhaps Volkswagen? Fahrvergnungen?
Monday, March 8, 2010
Warmth
Okay, it seems warm enough now to be working on the car. I hope to get back at it soon. Unfortunately, my Passat is crippled right now and may need a new engine. Yikes! There is over 5 grand I had not been planning on.
The next couple of weeks will be busy with preparing for my annual fantasy baseball draft and dealing with the Passat. Taxes need to get done soon, among other things. The Cobra is not going to jump to the front burner for a little while longer.
The next couple of weeks will be busy with preparing for my annual fantasy baseball draft and dealing with the Passat. Taxes need to get done soon, among other things. The Cobra is not going to jump to the front burner for a little while longer.
Friday, February 12, 2010
Brrrr...
Sadly, it is still too cold to crawl around on the garage floor. I am anxious to be able to get back to work on the car, but nothing has been getting done. Sorry.
Friday, January 15, 2010
Surprise!
I worked on the car for the first time in 2 months today! Well, it was only for about half an hour, but it was productive. I cleaned the garage a lot first as there was a lot of dirt from fall's leaf mulching and leftover fiberglass dust from cutting the relief in the cockpit. Then I jacked the car back up in the air so I could get under it and re-install the transmission oil pan. It is not completely torqued to final spec yet, but having the cover on ought to help protect its internals from winter's elements.
The next 2 jobs would be to order the driveshaft and to retouch the rustproofing paint job on the frame. I missed a fair amount on the underside, and there is enough surface oxidation that the paint should really stick well. I just want it to be a little warmer for that. All the driveshaft needs is money at this point.
The next 2 jobs would be to order the driveshaft and to retouch the rustproofing paint job on the frame. I missed a fair amount on the underside, and there is enough surface oxidation that the paint should really stick well. I just want it to be a little warmer for that. All the driveshaft needs is money at this point.
Subscribe to:
Comments (Atom)