Sunday, October 23, 2011
Monday, October 17, 2011
Maybe this week...
I've somehow managed to be very busy lately and still haven't found time to work on the Cobra.
Tuesday, October 11, 2011
No work
Apparently, I am getting so slothful, that not only have I not been working on the Cobra, but I am delinquent in posting about my slothfullness. Sorry. Maybe this week.
Monday, October 3, 2011
Another busy week...
that prevented me from working on the Cobra. I did however work on the Passat. Its headlight went out, this time on the driver side. Two years ago, the passenger side went out and I replaced it. This time, it was even easier as there was less stuff in the way. $15 for the light and 15 minutes and the job was done. The hardest part was figuring out how to work around the fact that the rod that holds the hood up so you can work on the engine is broken. Maybe I will buy one of those for $25 bucks and fix that too someday, but a big board I had laying around seemed to do the trick just fine.
Monday, September 26, 2011
RAV work
I did a lot of carwork last week, all on the RAV 4 though. It had finally gotten to the point it would not run long at all before starting to stumble. The plug wire kept getting loose almost immediately. And I also started to get the check engine light coming on. Interestingly, it happened while on my way to Home Depot to buy a new water heater for the house, but that is a different time-consuming story. Anyway, I ended up buying a cool, cheap OBD2 code reader at Harbor Freight to double check my suspicions about the engine misfires, and when I used it, I learned that there were 5 codes. Two were for the suspect cylinder, two others were for multiple cylinders, and one was for a different cylinder. I also bought a neat Haynes Repair Manual for the RAV 4 at AutoZone. It gives complete illustrated instructions on just about everything you can think to do to the car.
I decided to replace all the spark plugs and bought some at Advance Auto. Nothing special, just your basic NGK plugs. I started with the obviously bad cylinder and could not get the plug out. I could get a grip on it with the long, deep plug socket, but I could not extract it from the hole (about 5 inches or so deep). I tried a long time and moved on to the second plug which came out with no problem. So I buttoned everything back up and the next day, I regrouped and decided to buy a really nice plug puller with a magnetized socket. Eleven bucks instead of 99 cents.
Next, I went to use this on the bad plug and could no longer even get a grip on the plug. It would not push down far enough. It felt like I was hitting on something rubber on top of the plug itself. The kid next door to me came over to help and we tried everything we could think of to get it out and failed. Eventually, I trekked back to Advance Auto and bought this cool super-long needle nose pliers and a good LED flashlight. With those, I was able to see some blockage and was able to break off a piece. Upon closer inspection, I determined that the plug wire boot had broken in place and that 90 percent or so of it was still down there. More poking and pulling loosened it a bit and eventually, I came up with the idea of using a turkey pin (basically, a very thin strong wire) as a type of pick. I bent the end and was able to hook the rest of the stranded boot plug. After that, I had to go back to Advance to buy some new plug wires as the old ones were clearly dead.
Finally, I was able to get the rest of the plugs out and replaced, and put on the new plug wires. Nathan had driven by on his way to his grandma's and actually stopped to help me for a few minutes. It went very smoothly, and now the RAV seems to be purring like a kitten. I just hope that there wasn't much/any leftover junk from the shredded plug wire boot that will find its way into the cylinder itself and possibly cause damage to the piston rings. Time will tell.
Sunday, September 18, 2011
No hot water
No, not the Cobra...my house. After 30 years of fine service, my hot water heater seems to have died. Any free time to work on the car this week instead went into the hot water heater problem. Sadly, I could not get it working again. So in the next day or two I will be buying a new one. Not sure who I will get to install it.
Sunday, September 11, 2011
Just one day's work
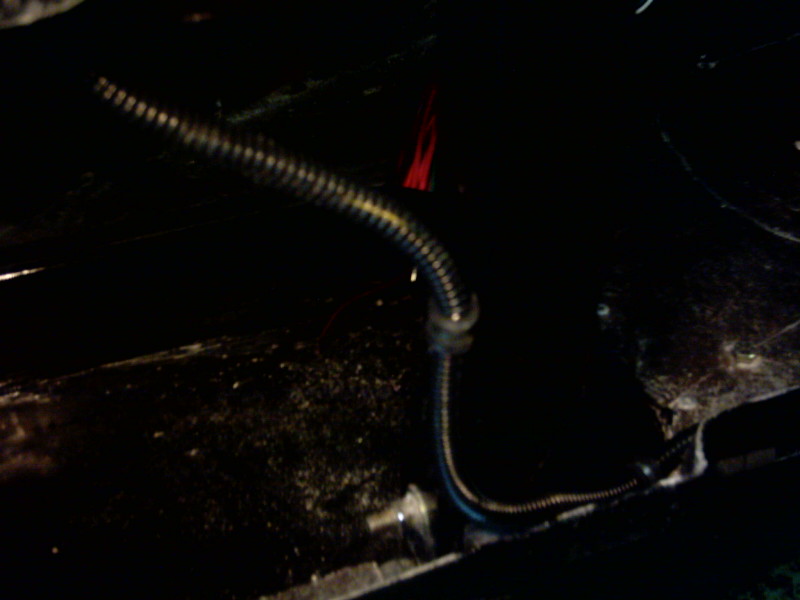
I worked on the Cobra one day this week, and completed a little of the wiring. I spoke to the owner at Haywire, the maker of my wiring harness and got clarification on my alternator exciter wire. It turns out the the mystery connector on that wire was to be connected to a matching one on a wire coming out of the harness that was hidden when I checked for it before. Once I knew how it connected it was pretty simple to thread it through the firewall and terminate it where it belongs. I also learned that the little bump a few inches from the connector end was a covered diode. The diode is a protection on the wire that keeps power from backflowing, like a one-way resistor.
The voltage regulator is now done. I added one additional wire from the alternator field terminal to the voltage regulator and I ended up running some convoluted tubing down the inside of the engine bay on the passenger side to act like a conduit. I also ended up shortening some previously run wires that had too much slack. Next up, I will have to finish the MSD ignition box and starter motor wiring, figure out the wiring I will need to run down the driver side engine bay for things like the horns, the radiator fan, etc. Shortly after that I can mount the fuse box and move onto the dash wiring of the gauges.
My camera seems to be unable to transmit pictures, so don't expect much for a while. I can take them with my good laptop, but that is cumbersome, and I don't like to take it into the garage.
Tuesday, September 6, 2011
Busy
I did not work on the car this week. It was surprisingly busy. When I did get around to calling about my wire confusion on Friday afternoon, I found that the techs had already bugged out for a long Labor Day weekend. Oh well...
Here is a picture of the wire in question with a connector which I don't have a clue about. (My old digital camera seems to have had its computer interface die, so I am having to use my laptop to take pics...Ugh)

Here is a picture of the wire in question with a connector which I don't have a clue about. (My old digital camera seems to have had its computer interface die, so I am having to use my laptop to take pics...Ugh)

Sunday, August 28, 2011
Wiring progress
Sorry I did not post last week. Laziness was unbeatable.
This week, my arm felt better than it has in 3 months. I was able to bowl on Monday and work about 5 hours on the car. I made some very good progress on wiring the Cobra. I planned the wire runs that go to the starter motor and did more on the alternator. I got all the wire into the convoluted tubing that works like a wire conduit and was able to mostly use some existing screws to fasten it down. I did have to drill a couple of holes in the frame for a couple of mounting hooks. This was very difficult work, lying on my back under the car with about a quarter inch clearance. Great test of the arms.
Next I had to cut the wires to the right length so they would be able to connect to the starter motor, but not too long to potentially drag or be exposed under the car. Measure twice, cut once.
After that I had to affix various terminators on the ends of the wires. Mostly they were ring or eyelet connectors, or spade connectors. This again required crimping in very cramped space under the car.
I also had to splice on a couple of fusible links to two of the wires. These are basically wires that have a built-in fuse like capability to blow if there are shorts that would threaten to do damage to the electrical parts. This was a little nerve-wracking in that I had to get it right the first time. No simply cutting it off and trying again if I made a mistake. Fortunately, everything went together beautifully.
For the week, I got all the wires terminated and in place, with one exception, so I have not tightened down everything onto the final posts. I will do that soon, after I resolve one wire question I still have about something called an "exciter" wire. Basically, it runs from the key switch to the alternator to tell it to start up right when you turn the key. The wire that came with my kit has a weird connector on it that I have to research a bit more.
So I do not have any final pictures this week. Laziness may have been defeated for the week, but not completely.
Sunday, August 14, 2011
Car work resumes
I actually was able to work on the Cobra twice this week. I did not accomplish a whole lot, but I did 1) mount the voltage regulator, and 2) crimped the connectors on and ran a couple of wires from the alternator to the regulator on the PS footbox. Still have a couple of more wires to go so I did not get any pictures.
I also found a mistake on the giant wiring schematic I am using. It was just a reversal of wire colors, nothing too major. But it is very confidence enhancing that I figured that out and was able to confirm it with the author who already knew about the error and just had not gotten around to fixing it.
I also found a mistake on the giant wiring schematic I am using. It was just a reversal of wire colors, nothing too major. But it is very confidence enhancing that I figured that out and was able to confirm it with the author who already knew about the error and just had not gotten around to fixing it.
Monday, August 8, 2011
Great news on the RAV4...
but no Cobra work. I got my mom's Toyota to work! I was getting ready to use a can of Seafoam to treat the engine, thinking that the problem was a stuck lifter. The engine was making a terrible ticking noise, which matched the engine RPMs, soundling like it was coming from the front of the engine block. Seafoam is a detergent-like additive that is petroleum based that is supposed to do wonders for fixing carbon deposit problems.
I was bringing the engine up to operating temperature and decided to try to isolate the noise better while it was warming up. In doing so, I started poking around and noticed that the plug wire running to the first cylinder was vibrating just a bit. Low and behold, I pushed down on it slightly, and it clicked back into place, ending the tapping noise! Somehow, that wire had gotten loosened over time and must have come completely off a few weeks ago while I was driving my mom home from the doctor. It was bucking a bit and lost a lot of power at the time, which I guess was the effect of turning a 4 cylinder engine into a 3!
I have now driven the RAV about 3 or 4 times on short trips and it is running beautifully. What a relief to not have to spend a dime getting it fixed.
As for the Cobra, I did manage to get to a couple of auto parts stores to buy some needed primary wire. The next thing I am going to do is install the external voltage regulator. Basically, it manages the amount of battery recharging done by the alternator. This week the weather is supposed to be a little cooler, so I should find some time for it.
Sunday, July 31, 2011
Heat and Arm Weakness
It is still damned hot and my arm strength is not back, so I still did not work on the car. I did do some more physical things this week and should hopefully get back to car work this week, although that may be on my mom's ailing Toyota RAV4.
Wednesday, July 27, 2011
Another week without carwork
Well, at least my Passat is fixed. A line from the radiator to the cooler went bad. Has anybody else noticed it is really hot?
Sunday, July 17, 2011
Now I have 3 non-functioning cars.
My Cobra got no attention this week. My Passat started alarming with coolant system issues. I have an appointment for a test on Monday. So I borrowed my mom's Toyota RAV4 for the week and it broke down too with a very nasty tapping noise in the engine. Could be a lifter or timing belt problem maybe. That waits til the Passat gets fixed.
Add to that, my 1990 RCA TV died this week. I got a replacement Panasonic from 2001 via Craigslist for $25. Works great, but the one problem I had was getting it put into the cubbyhole of my entertainment center. My neck is still so bad that I can't lift a can of soda, much less a gargantuan old TV. A little ingenuity for a car guy and the problem was solved.

Oh, here is the picture I promised of my ignition system installed on the passenger side footbox.

Monday, July 11, 2011
I got my motor running...
on my lawn mower! That is the most mechanical thing I did last week and none of it involved the Cobra. The lawn mower had a leaky connection of its gas line to the tank and I tightened it up, so my garage won't reek now.
Monday, July 4, 2011
Slowly getting back
I did manage to spend a few minutes on the car this week, as the neck pain has pretty well diminished, but I still have very little left arm strength. My physical therapy exercises will hopefully work, but may actually take a couple of months. Ugggh.
Anyway, I had an easy task to do this week. Or at least I thought so. I mounted the ignition control box to the passenger side footbox. There were 4 little rubber feet that cushion it from vibration that simply needed holes drilled and nuts tightened. Simple enough...except the instructions from the manufacturer, MSD, were wrong. They said to use a 1/8" bit, but that was not near big enough for the threads of the feet to pass through, so I had to re-drill them (twice actually as I was guessing at the perfect size which turned out to be 3/16"). I placed it so that I can later install footbox vents if I so decide. Pics will follow.
Anyway, I had an easy task to do this week. Or at least I thought so. I mounted the ignition control box to the passenger side footbox. There were 4 little rubber feet that cushion it from vibration that simply needed holes drilled and nuts tightened. Simple enough...except the instructions from the manufacturer, MSD, were wrong. They said to use a 1/8" bit, but that was not near big enough for the threads of the feet to pass through, so I had to re-drill them (twice actually as I was guessing at the perfect size which turned out to be 3/16"). I placed it so that I can later install footbox vents if I so decide. Pics will follow.
Sunday, June 26, 2011
Another lost week
I am sure ready to be done with the arm/neck problems. The pain is a lot better, but I have almost no strength in my left arm and cannot raise it above my chest. I start physical therapy on Tuesday.
Sunday, June 19, 2011
No Work
I had my MRI and epidural steroid injection this past week. The results were not all that I hoped for. The pain is greatly reduced, but I am still taking the medications as well as the effects of the shot. I have cut back a bit and the pain does not seem bad. However, I still have very little strength in my left arm. I can only raise it a few inches and cannot keep it up on its own. I am trying some stretching and it seems to be working just a bit, but I may need to take some physical therapy treatments. Anyway, it makes car work too difficult.
I have done a little thinking about whether or not to install fresh air ducts into the footboxes. Many people say they are needed, but they are not part of the kit per se. Now would be a good time to put those in. Still thinking...
I have done a little thinking about whether or not to install fresh air ducts into the footboxes. Many people say they are needed, but they are not part of the kit per se. Now would be a good time to put those in. Still thinking...
Sunday, June 12, 2011
Bad week
I did not work on the car this week. I started out putting time in searching for my nephew's lost dog. Happily, after 83 hours of being AWOL, Snowy turned up over 3 miles from home. She is home and doing fine now.
The really bad news was that I re-injured my neck. Three years ago I suffered a terribly painful couple of months with a some protrusions of nerves in my neck between a couple of vertebrae. Well, this week it came back. Not that surprising; if anything, I was lucky to be good for so long since the last treatment. Anyway, I am set for another MRI and hopefully another ESI (epidural steroid injection) right after that. Last time I got relief almost immediately. Right now I am drugged enough to be out of the worst pain, but I can't really lift my left arm. So the car is back on the back burner for now.
The really bad news was that I re-injured my neck. Three years ago I suffered a terribly painful couple of months with a some protrusions of nerves in my neck between a couple of vertebrae. Well, this week it came back. Not that surprising; if anything, I was lucky to be good for so long since the last treatment. Anyway, I am set for another MRI and hopefully another ESI (epidural steroid injection) right after that. Last time I got relief almost immediately. Right now I am drugged enough to be out of the worst pain, but I can't really lift my left arm. So the car is back on the back burner for now.
Sunday, June 5, 2011
Ignition system begun
This week, I accomplished mounting the ignition coil to the engine block and connecting it to the distributor. This was not so easy a task as you might think. Most guys attach the coil to the front of the driver side engine heads. In my case, I already had the power steering pump using those bolt holes with the special mounting plate I had Jerry build for me a couple of years ago. There is just one big cable running from the coil to the distributor, and it would not have been a huge deal to locate it far away, but I did not have a cable long enough and did not want to spend any more money than necessary. And besides, it seems like such a natural place to put the coil right on the front of the engine.
I tried lots of ways of reusing the holes that were on Jerry's plate. There were 3 holes with bolts holding the plate and PS pump in place. Normally guys would use the outside ones, but that was impossible for me. And using the 2 inside holes was close to fitting, but just a little too close. Eventually, I widened the coil bracket holes, changed the angles of the bracket a bit, shortened the bolt that closes the coil bracket loop a couple of times and used a bit of oil to lube the outside of the coil just enough to squeeze it into the bracket. It even required a special precise installation order to get everything to clear all of the bolts in the area. Of course, this was only determined by trial and many errors!
Here are a few of the finished pics...


Next, there are a couple of signal wires that run from the ignition box to the distributor and a couple of power wires that run from the ignition box to the ignition coil. So I had to decide where/how to install the ignition box. Most people put it on top of the passenger side footbox. So I spent a lot of time browsing the pictures of every finished Hurricane and every Cobra replica up for sale on the main website where they are sold, Cobra Country. I am pretty sure how I want to run things and that I will indeed put the MSD ignition brain on the PS footbox, but it got too hot and too short on time this week to finish that job.
Sunday, May 29, 2011
49.99726
That is how old I am as I write this post. I had hoped to be able to start the car by tomorrow, but that won't happen. I lost too much time this spring on the windshield wipers. Maybe by the 4th of July; I am back to making good progress.
This week, I finally settled on the right wire twisting and soldering techniques, so the splices for the rear light branch were much easier.

I got all of those wires (brake lights, tail lights, fuel sender, grounds) run through the cockpit to the trunk area. There they sit til later in the build when the trunk gets put into place.


Now I am going back to work on engine wiring. There is SO much involved--battery, fusebox, ignition switch, ignition box, neutral safety switch, alternator, voltage regulator, starter motor, solenoid, ignition coil, distributor, carburetor choke. I am spending a LOT of time reading and trying to get it all straight in my head.
Sunday, May 22, 2011
Learned alot; Accomplished a little
I don't have much in the way of good photography this week, but I did spend some significant time working on the wiring. When I got to the point where I was supposed to splice in extra wires for the front headlights (high beam, low beam, ground, parking) I learned that my soldering skills were really much worse than I remembered. I ended up trying over and over again to get a good clean looking connection that did not have gigantic globs of solder, but it was a struggle.
I ended up trying several different ways of making the mechanical connection of the wires, of soldering, of heat shrink wrapping. I must have done things over 7 or 8 times on one set of wires alone. Later, I tried crimping, but that did not go any better. Multiple tries to get the wires to fit in the connector, to get a good crimp, to get it all heat shrinked. Lots of fishing wires in and out of the loom, too.
In the end, I did get all 4 splices made and looking halfway decent. Some were soldered and some were crimped. I think I have the hang of the right techniques for twisting the wires together, for soldering, for crimping, for shrinking the heat wrap. Some of my problems are from crappy tools, but mostly its is me.
Anyway, the front light branch is basically in place and next come the front engine branches for power and signals, and the rear light branch. I am probably going to go to the rear light branch next as that is more straight-forward with what is required. Another upcoming step then will be to affix the fuse box under the dashboard. Hopefully I will get to all of that this upcoming week.
Saturday, May 14, 2011
Wiring started
I got a fair amount done this week, although I did lose a couple of very nice weather days thinking that I was missing 2 parts that were really there all along.
The first step was to drill a couple of holes in the firewall for the wires to pass through and to install grommets in the holes to protect the wires. I could not find the grommets. All I did find were 2 very small things labeled grommets that were not on my inventory sheet or covered in the manual, that I could tell. I went to a couple of autoparts stores looking to buy what I needed, but they did not have grommets that big. I posted a question on the Hurricane owners forums and eventually came to believe the grommets I have are for the sidepipe installation that comes much later.
I decided to flip through some old paper catalogs I have from some mail order autoparts stores and came across a picture of a wiring harness, similar to mine, that seemed to show the kind of grommets I would be needing. So I decided to look through my wiring harness kit again and found the grommets I needed all along in a bag with some electrical relays and switches. I felt stupid for overlooking them, but thrilled to be able to get back to working again.
The grommets proved to be just a little bit tricky and I did not have a hole saw or drill bit that was 1 3/8". I had 1 1/4 or 1 1/2. Rather than fiddle around with drilling it small and hand-widening it, I went to Sears and spent a few bucks for a new bit. The other problem was that the slit in the grommets was very small, so it only went around the aluminum sheets attached to the fiberglass on the firewall. So that meant I needed to cut the fiberglass hole about a 1/4" bigger than the aluminum. I did that with some die grinder trickery and now things seem to fit nicely.


Next I unpacked the wiring harness and stared at all of the wires trying to figure out what goes where. The instructions are okay, but there was no wiring diagram included with the harness by the manufacturer. A previous builder had done a beautiful 30"x36" PDF of it though, and Jerry was kind enough to print one out for me on his big plotter.


The next steps are pulling with wires together and through to their various locations. I also had to install some wire clamps to hold the plastic split looms that the wire runs in. Packing the wire into those was more time-consuming than you would think. It is a pretty tight fit. The first branch to be done is the one going to the front of the car for the headlights, bright and dim, turn signal lights, parking lights, and ground. There was also some cutting and splicing which it turns out I am not very good at.


Sunday, May 8, 2011
Body is off
I did manage to get some help this week and get the body taken off of the Cobra. Now I can get on to the wiring work. There really wasn't anything too picture-worthy, but next week should be a good one. I also bought a new soldering iron for $3.99 at Harbor Freight. Wish me luck that it works; I just couldn't see spending 4 or 5 times that for one from Sears.
Monday, May 2, 2011
Monday, April 25, 2011
Another workless week
It is hard to see how I am ever going to make progress without actually ever working on the car. I did nothing this week again. I had a lot of bowling league end-of-year work to do, divying up over $14,000. Maybe this week, assuming Dan Dog gets feeling better.
Sunday, April 17, 2011
Still busy with real life
I put in less than half an hour on the car this week. I did a little test fitting of the wiper system and filed down the two bushings that come with the wipers. They needed to cut to about 45 degrees, but out of the package were only about 20 degrees. I am still leery about making all of the wiper trim pieces and such fit properly, but for now, I need to move on to other parts of the car. And for that I will need to recruit some helpers to remove the body.
Sunday, April 10, 2011
No work
Sorry folks, I did not work on the car this week. Quite a few real life things I need to get done right now.
Sunday, April 3, 2011
Wiper infrastructure done
This week saw me complete the windshield wiper setup, but not complete the final installation which occurs later. To do this required mounting the body and for that I recruited the most wonderful family members for some badly needed help.
On Saturday, Elaine, Abby and Neo came by to help move the body off of the buck and onto the frame. Here is Abby.
It was light and went fairly smoothly, although the instructions in the manual were pretty sparse. Eventually we got it into place. Then we tried to re-install the windshield that was assembled 3 years ago with very little luck. Eventually, I determined that Phil, Nathan and I had made something of a mistake back when we drilled the holes into the frame to hold the windshield legs.
In looking back over some old pictures and my work spreadsheet, I figured that we started out drilling the holes right, but had so much trouble with my underpowered drill that we switched to drilling the holes with the body off. We must have miscalculated where the legs of the windshield would go. We got them at the proper angle and basic location, but there was just no way to get them to go through the slots cut in the body.
On Sunday, Nathan came over and I jogged his memory from when we originally did the windshield support holes and how to best fix everything. We decided that only 2 things could possibly have been done wrong--either the body/cockpit mounting was wrong, or the original hole drilling was wrong. We decided to completely fit the body with all mounting points in place to make 100% certain that we would be good to proceed safe in the knowledge that the body was right. So we installed a rollbar, the front body mount pieces and the front and rear quick jacks. The bottom line, was that the body/cockpit were fine. (The sidepipe cutouts may be an issue later, but that is pretty common on these cars). Here are some pics...
Rollbar...

Rear quick jacks...

Front body mounts...

Confident that the body/cockpit was fine, Nathan and I next had to decide what to do about the windshield not being mountable as the holes did not line up. We could have re-drilled new holes, but that is very tough at this stage and the sweep angle of the windshield would only have been about 29 or 30 degrees instead of the desired 37. We could have modified the frame and winshield legs to make it work, but that could have slightly reduced their holding strength and that seemed like a bad idea. So we decided to elongate the slots that were cut in the fiberglass where the legs go through the body to tie into the frame. We filed out about 3/8 of an inch or so. Some previous builders had to do this too. If you look at the first picture in this post with Abby, you can see the windshield leg going through the slot at the wrong angle and not lining up with our holes. Now the old pre-drilled holes are very close to lining up perfectly and we have an exact 37 degree sweep. A little more embiggening (Nate said he learned that word in Engineering School) of the holes will make things fit very well.
So at this point, we knew the windshield was very very close to its proper permanent location and we could proceed to drill the 2 holes in the body to accomodate the wiper arm mounts that I assembled last week. The holes had to be 20 inches apart at a 45 degree angle, and according to many previous builders, the manual is wrong about how close to drill the holes to the windshield. The instructions said 3 inches from the engine bay opening, but everybody agrees that they need to be much closes to the windshield itself. After measuring twice we drilled the 2 holes. You can see one in this picture...

Here are a couple of pics showing the body in place, the windshield at the right angle and the wiper arm holes drilled. We test-fit the wiper assembly and it seems fine.


All of this was painfully done knowing that the wipers are unlikely ever to be used! It is an open car not meant to ever be driven in the rain! But the state of Missouri requires them on all cars, so on they go. And from reading the other builders' posts about these wipers, there may be future troubles with the motor sort of shaking the arms too much and not working well. I doubt that the state inspector will even test them, frankly. Anyway, now the body can come off again and I can start the wiring.
On Saturday, Elaine, Abby and Neo came by to help move the body off of the buck and onto the frame. Here is Abby.

It was light and went fairly smoothly, although the instructions in the manual were pretty sparse. Eventually we got it into place. Then we tried to re-install the windshield that was assembled 3 years ago with very little luck. Eventually, I determined that Phil, Nathan and I had made something of a mistake back when we drilled the holes into the frame to hold the windshield legs.
In looking back over some old pictures and my work spreadsheet, I figured that we started out drilling the holes right, but had so much trouble with my underpowered drill that we switched to drilling the holes with the body off. We must have miscalculated where the legs of the windshield would go. We got them at the proper angle and basic location, but there was just no way to get them to go through the slots cut in the body.
On Sunday, Nathan came over and I jogged his memory from when we originally did the windshield support holes and how to best fix everything. We decided that only 2 things could possibly have been done wrong--either the body/cockpit mounting was wrong, or the original hole drilling was wrong. We decided to completely fit the body with all mounting points in place to make 100% certain that we would be good to proceed safe in the knowledge that the body was right. So we installed a rollbar, the front body mount pieces and the front and rear quick jacks. The bottom line, was that the body/cockpit were fine. (The sidepipe cutouts may be an issue later, but that is pretty common on these cars). Here are some pics...
Rollbar...

Rear quick jacks...

Front body mounts...

Confident that the body/cockpit was fine, Nathan and I next had to decide what to do about the windshield not being mountable as the holes did not line up. We could have re-drilled new holes, but that is very tough at this stage and the sweep angle of the windshield would only have been about 29 or 30 degrees instead of the desired 37. We could have modified the frame and winshield legs to make it work, but that could have slightly reduced their holding strength and that seemed like a bad idea. So we decided to elongate the slots that were cut in the fiberglass where the legs go through the body to tie into the frame. We filed out about 3/8 of an inch or so. Some previous builders had to do this too. If you look at the first picture in this post with Abby, you can see the windshield leg going through the slot at the wrong angle and not lining up with our holes. Now the old pre-drilled holes are very close to lining up perfectly and we have an exact 37 degree sweep. A little more embiggening (Nate said he learned that word in Engineering School) of the holes will make things fit very well.
So at this point, we knew the windshield was very very close to its proper permanent location and we could proceed to drill the 2 holes in the body to accomodate the wiper arm mounts that I assembled last week. The holes had to be 20 inches apart at a 45 degree angle, and according to many previous builders, the manual is wrong about how close to drill the holes to the windshield. The instructions said 3 inches from the engine bay opening, but everybody agrees that they need to be much closes to the windshield itself. After measuring twice we drilled the 2 holes. You can see one in this picture...

Here are a couple of pics showing the body in place, the windshield at the right angle and the wiper arm holes drilled. We test-fit the wiper assembly and it seems fine.


All of this was painfully done knowing that the wipers are unlikely ever to be used! It is an open car not meant to ever be driven in the rain! But the state of Missouri requires them on all cars, so on they go. And from reading the other builders' posts about these wipers, there may be future troubles with the motor sort of shaking the arms too much and not working well. I doubt that the state inspector will even test them, frankly. Anyway, now the body can come off again and I can start the wiring.
Sunday, March 27, 2011
Wipers assembled
This week had me working at the workbench, assembling the windshield wiper kit. It was particularly fun. It was pleasant to work inside the warmth of my laundry room, and sitting on a stool, instead of lying on the cold garage floor. The tasks were well defined in the manual--basically lots of measuring and cutting the aluminum tube that holds the cable that drives the wiper arms, flaring the ends so that they won't move when connected to the motor and arm mounts, and then putting it all together. In the end, I did a pretty good job, I think, on this part. Here are some pictures...


Next comes mounting that into the car, and the first thing to do there is cutting a couple of holes at a 45 degree angle into the fiberglass body. To get that right, I have to temporarily install the body onto the frame and the windshield as well. Unfortunately, the manual it is now decided amongst the other builders on the Hurricane forum, is wrong about the best place to locate the holes. Not the sort of thing that makes me feel warm and fuzzy. Anyway, I am stuck for now until I get a few people over to help lift the body off the buck and put it in place. I had hoped to do that this weekend, but a family friend suddenly passed away and made for some changing plans.


Next comes mounting that into the car, and the first thing to do there is cutting a couple of holes at a 45 degree angle into the fiberglass body. To get that right, I have to temporarily install the body onto the frame and the windshield as well. Unfortunately, the manual it is now decided amongst the other builders on the Hurricane forum, is wrong about the best place to locate the holes. Not the sort of thing that makes me feel warm and fuzzy. Anyway, I am stuck for now until I get a few people over to help lift the body off the buck and put it in place. I had hoped to do that this weekend, but a family friend suddenly passed away and made for some changing plans.
Sunday, March 20, 2011
Exactly as expected
I got no work done this week on the car. I did manage to open the box with the parts for the next step, the windshield wipers. Here is a picture I took to keep you all rewarded for checking back weekly.


Saturday, March 12, 2011
Inner fenders finished
I was able to spend a good amount of time working on the cobra this week. I managed to finish the installation of the aluminum inner fender panels.
The first step was to tape the panels in place.

Next, I drilled some holes and riveted the top of the panel to the frame.

Then came drilling a couple of holes through the front for later attaching the panels to the radiator. Sorry, but I did not get any good pictures of that.
Next came drilling some holes through the bottom of the panel, bolting the panel to the brackets that hold the bottom of the panel against the frame, and finally screwing the brackets into the holes in the frame. Here are some completed pics of the bottom.


The passenger side went quite easily (except for breaking my 11/64" drill bit and having to run to Sears and get another). I did the driver side second, and luckily, it seems that I just barely had the power steering pump clear the panel. Here is a picture of that and another showing the driver side from the outside.


The next step has to be to install the windshield wiper motors under the dash. Unfortunately, I will need help with this as the body has to be installed to drill the holes through which the wipers will eventually get mounted. I had hoped to be able to wait on this step until later, but everybody tells me that they really have to go in now as later there will be too much wiring in place to get the wiper motors in their right place.
These wipers are a notoriously weak part of these cars. They are a fairly complicated install and really aren't that necessary since a topless car shouldn't be driven much in the rain anyway. But Missouri requires them, so on they will go. Given the difficulty of this step, and my upcoming fantasy baseball draft, I don't think I will get much done on them for the next week or two.
Thursday, March 3, 2011
Brake lines finished
I finished the brake lines this week. The final step had been to secure the lines running from the master cylinders to the couplers on the frame that got run a long time ago.

I ended up doing it twice because I was not happy with the way it all came out the first time. Mainly, I did not like that the manual called for the use of #10 screws going into the footbox. I did it the way the manual said at first, but then removed the screws and replaced them with 5/16" rivits. Now there is nothing pointy poking through the footbox around my feet.
I also ended up slightly rerouting the lines to get a little more clearance around the big fuel line. I am still not overjoyed with the way the three lines (front and rear brakes, and fuel) run, but it will do, I guess.

A more troubling clearance matter is that there is only about 1/4" between the brake lines on the footbox and the headers coming out of the engine. The headers get extremely hot, and can do bad things like overheat the brake fluid effecting their performance. Here is a blurry picture of just how little room there is. (The header exhaust holes are covered in green tape and eventually connect to the sidepipes).

I have no idea if there are leaks in the system or not. I suppose I could fill the system with brake fluid to test, but it seems less likely to be depressing to just assume it is okay. And I still need at some point to hook up the brake fluid reservoirs, but that comes much later in the build.
Next up is to attach the inner fender liners. Boy, it is really unclear to me how to make the pieces I have work. Everything is so tight and the clearances around the suspension pieces and power steering pump look almost impossible. Better do the passenger side first.
Friday, February 25, 2011
I'm baaaaack
Not working on the car just yet, but felt like at least blogging.
This week marked the third anniversary of picking up my kit. It has been a lot of fun so far, though the problems I've run into sometimes get a little depressing. In about 3 months, I will become eligible for the senior tour (turning 50) and it would be kind of nice to make some serious progress on the car before then. My schedule does not look too bad, knock on wood.
First, let's summarize where I am. The car is getting close to being a go-kart. The only system that has not had substantial work is the electrical. Frame, fueling, suspension, brakes, engine, transmission, exhaust, steering are pretty far along. Cooling needs pretty much work. Going by the manual, I have completed about 102 pages out of 200 or so. That is 17 out of 37 chapters.
So I think it is probably reasonable at this point to set a goal of starting the engine and actually riding it as a go-kart at least down the street by the end of May. I have always refrained from setting any kind of timetables or goals because I never wanted to turn this project into work instead of just a hobby. But it seems now that a significant milepost is attainable with some consistent efforts. So pray for decent weather and keep checking back here now. Weekly posts should be reliable again.
Next up...affixing the inner fender liners to the frame. After that, according to the manual at least, is the windshield wiper assembly.
Subscribe to:
Comments (Atom)